Table of Contents
ToggleBuilding a dedicated home theater turns movie nights into real events. Whether working with a spare bedroom, basement, or bonus room, the right design choices can create an immersive viewing experience that rivals commercial cinemas. Success depends on understanding how room selection, equipment placement, seating geometry, and acoustic treatments work together. This guide walks through practical decisions that transform ordinary spaces into entertainment destinations, no fluff, just the technical and design considerations that matter.
Key Takeaways
- Home theater design ideas thrive when room selection follows a 1.6:1 length-to-width ratio with 9–10 foot ceilings to minimize acoustic issues and maximize sound quality.
- Audio and visual equipment must work together: pair 5.1 surround sound systems with appropriately powered receivers (80–120+ watts per channel) and position subwoofers using the crawl test for optimal bass distribution.
- Seating geometry matters as much as equipment—position viewers 1.0–1.5× screen width away for 4K displays, elevate back rows 12–18 inches on risers, and allow 36–42 inches between rows for comfortable access.
- Soundproofing and acoustic treatment are distinct: use mass-loaded vinyl, double-stud construction, and 6–8 inch bass traps in corners, while treating first reflection points with 2–4 inch fiberglass panels.
- Layered lighting with dimmable overhead circuits, low-voltage LED strips, and smart controls enables safe navigation without washing out the screen during viewing.
- Dark matte paint, commercial-grade carpet, and acoustically transparent fabric wall panels complete the home theater design while absorbing light and sound reflections that degrade the viewing experience.
Choosing the Right Room for Your Home Theater
Room selection drives every downstream decision. Basements often work best because they’re naturally isolated from noise, easier to darken completely, and typically feature rectangular dimensions that simplify speaker placement.
Ideal room dimensions follow a 1.6:1 length-to-width ratio to minimize acoustic standing waves. A 12′ × 20′ space works well for smaller setups: 15′ × 24′ accommodates tiered seating and better equipment separation. Avoid perfect squares, they create harsh frequency buildups that even treatment panels struggle to tame.
Ceiling height matters more than most realize. Eight-foot ceilings work but feel cramped once acoustic panels, recessed lighting, and potential riser platforms take vertical space. Nine to ten feet provides breathing room and better sound dispersion.
Check for structural obstacles before committing. Load-bearing walls, HVAC ductwork, and plumbing stacks limit where walls can be moved or soundproofing added. Rooms with exterior walls require more insulation work to control temperature and block outside noise.
Electrical capacity needs assessment upfront. A serious home theater pulls significant amperage, amplifiers, projector, subwoofers, lighting controllers, and HVAC all run simultaneously. Most dedicated theaters benefit from a 20-amp dedicated circuit minimum: larger setups may need multiple circuits or a subpanel. Consult an electrician if the existing panel lacks capacity for additional breakers.
Windows complicate light control. While blackout curtains help, rooms without windows eliminate light bleed entirely and simplify wall treatment. If windows exist, plan for layered blackout solutions, cellular shades behind heavy curtains work better than single-layer fixes.
Essential Audio and Visual Equipment for Immersive Entertainment
Display choice splits between projectors and large-format TVs. Projectors deliver true cinema scale, 100″+ screens, but require complete darkness and throw distance (typically 1.5× screen width for most models). Short-throw projectors reduce this to 4–6 feet but cost more. TVs from 75″ to 98″ work in rooms with ambient light and skip the maintenance of projector bulbs, though screen size caps lower.
For projectors, screen material affects image quality significantly. White matte screens suit dark rooms with good projectors: gray screens (0.8–1.0 gain) improve contrast in spaces with residual light. Acoustic-transparent screens let speakers hide behind the display for clean aesthetics but cost 40–60% more than standard materials.
Audio configuration starts with a 5.1 setup (five speakers, one subwoofer) as the minimum for true surround sound. Front left, center, and right speakers handle dialogue and primary effects: surround speakers create spatial effects: the subwoofer covers bass below 80 Hz. Serious enthusiasts move to 7.1 or Dolby Atmos systems with ceiling-mounted height channels, this requires in-ceiling speaker installation during construction or retrofit work that may involve cutting drywall.
Receiver power needs to match speaker impedance and room size. An AV receiver rated for 80–100 watts per channel drives most bookshelf speakers in rooms under 300 sq ft. Larger spaces or floor-standing speakers benefit from 120+ watts per channel. Don’t cheap out here, underpowered receivers clip and distort at volume, damaging speakers over time.
Subwoofer placement follows the “crawl test”: place the sub in the primary seating position, play bass-heavy content, then crawl around the room’s perimeter listening for the spot with the smoothest, most powerful bass. That’s where the subwoofer goes. Corner placement amplifies output but can create boominess: midwall positions often sound tighter.
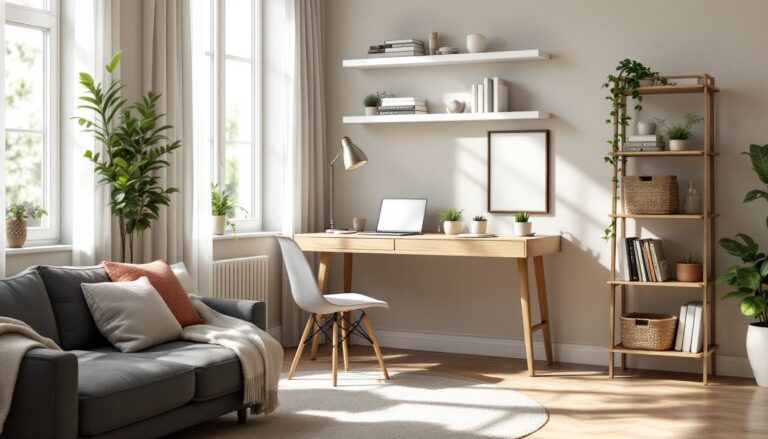
Many rooms with dedicated entertainment spaces also integrate smart home controls for lighting and climate alongside AV equipment.
Seating Arrangements That Maximize Comfort and Viewing Angles
Viewing distance determines screen size and seating layout. For a 4K display, sit 1.0–1.5× the screen width away: for 1080p, use 1.5–2.5×. A 120″ diagonal screen (105″ wide) means primary seating at 9–13 feet for 4K. Closer feels immersive: farther reduces impact.
Seating rows need careful geometry. The front row should sit at the calculated viewing distance: second-row seats elevate 12–18 inches on a riser platform to see over front-row heads. Building a riser involves framing a 2×6 or 2×8 platform, securing it to floor joists if possible, and finishing with the same flooring as the room or carpet for sound absorption.
Theater-specific recliners beat regular furniture because they’re designed for long viewing sessions with proper lumbar support and powered footrests. Seat width runs 22–24 inches: allow 26–28 inches of overall width per person including armrests. Three seats need about 7 feet of wall width minimum.
Aisle spacing prevents the awkward climb-over when someone needs the bathroom mid-movie. Rows should have 36–42 inches from the seat back to the next row’s front edge. Tighter spacing works for two seats with access from both sides: three or more seats benefit from a center aisle.
Cup holders and tray tables aren’t just luxury, they prevent spills on expensive equipment. Built-in options mount between seats or on armrests. For DIY builds, router-cut circles in wooden armrest tops work surprisingly well when lined with rubber grommets.
When choosing furniture layouts for multipurpose rooms, balance theater seating with flexibility for other activities if the space isn’t dedicated solely to viewing.
Lighting Design and Ambiance Control
Complete darkness isn’t practical, people need to navigate safely and find remotes. Layered lighting solves this with separate zones controlled independently.
Dimmable overhead lights on a separate circuit handle pre-show setup and cleaning. LED recessed cans with blackout baffles minimize light spill toward the screen. Wire these to a dimmer switch: Lutron Caseta or similar smart dimmers allow control from smartphones or voice assistants.
Sconce lighting along side walls or step lights on risers provides enough illumination for safe movement without washing out the screen. Low-voltage LED strips (12V or 24V) behind the screen or under riser platforms create subtle ambient glow. Red or amber LEDs preserve night vision better than white or blue.
Fiber optic star ceilings add theater ambiance by mimicking a night sky. Installation involves drilling hundreds of small holes in drywall or acoustic panels, threading fiber strands through, and connecting them to a central LED illuminator. It’s tedious work but creates a signature look. Skip this if soundproofing matters more, every ceiling penetration compromises acoustic isolation.
Avoid can lights directly above seating, they create glare on screens and reflect off eyeglasses. If existing cans can’t be relocated, angle-adjustable trim rings let you aim light away from viewing zones.
Smart lighting controllers like Control4 or Savant integrate with AV systems to dim lights automatically when playback starts. DIY alternatives use Philips Hue or LIFX bulbs with automation routines, not as seamless but functional at a fraction of the cost.
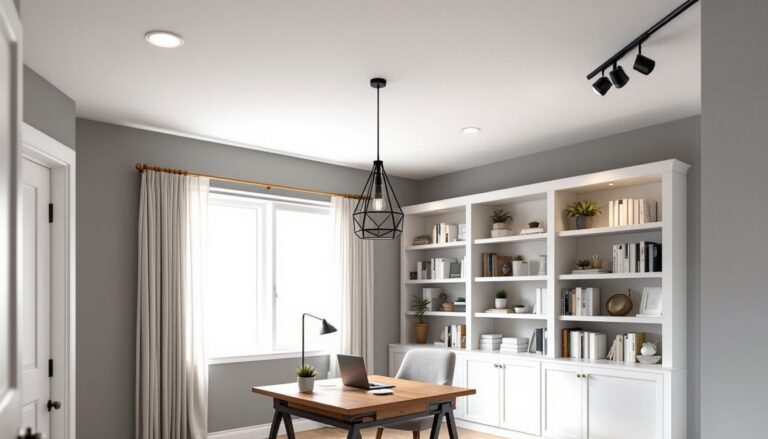
For more ways to create functional and stylish room transformations, layered lighting remains a key principle across home design projects.
Soundproofing and Acoustic Treatments for Better Sound Quality
Soundproofing stops noise transfer: acoustic treatment improves sound within the room. They’re not the same, and both matter.
Soundproofing walls requires mass and decoupling. Standard stud walls with drywall on both sides transmit sound easily. Effective soundproofing adds mass-loaded vinyl (MLV) between layers, uses double-stud construction (two separate stud walls with an air gap), or resilient channels that decouple drywall from studs. Green Glue damping compound between drywall layers converts vibration to heat, one tube covers 16 sq ft. Two layers of ⅝” drywall with Green Glue between them outperforms single-layer walls dramatically.
Doors leak sound like crazy. Solid-core doors beat hollow-core, but real improvement comes from adding weatherstripping, door sweeps, and automatic drop seals that press against the threshold when closed. Soundproof-rated doors (STC 45+) exist but cost $800–1,500 installed.
Acoustic panels control reflections and echoes inside the room. First reflection points, where sound bounces off walls before reaching ears, need 2–4 inch thick fiberglass or mineral wool panels. Find these spots by having someone hold a mirror on the wall while seated: if you see the speaker in the mirror, that’s a reflection point needing treatment.
Ceiling clouds (panels suspended horizontally) tame vertical reflections. In rooms with hard floors (tile, hardwood), ceiling treatment becomes critical because sound bounces between parallel hard surfaces creating flutter echo.
Bass traps go in corners where low frequencies accumulate. These need to be thick, 6–8 inches minimum, and dense. Rigid fiberglass panels (Owens Corning 703 or Roxul Safe’n’Sound) work well. Build frames from 1×6 or 1×8 lumber, fill with insulation, wrap in acoustic fabric, and mount in room corners floor-to-ceiling.
Consider the design principles that apply across renovation projects when planning acoustic work, as proper preparation prevents poor performance.
HVAC noise matters too. Flexible duct lining, in-line silencers, and variable-speed blowers keep climate control quiet. Route ductwork away from the room if possible: if not, wrap ducts with acoustic duct liner and seal all joints with mastic (not tape, it fails over time).
Decor and Theme Ideas to Personalize Your Home Theater
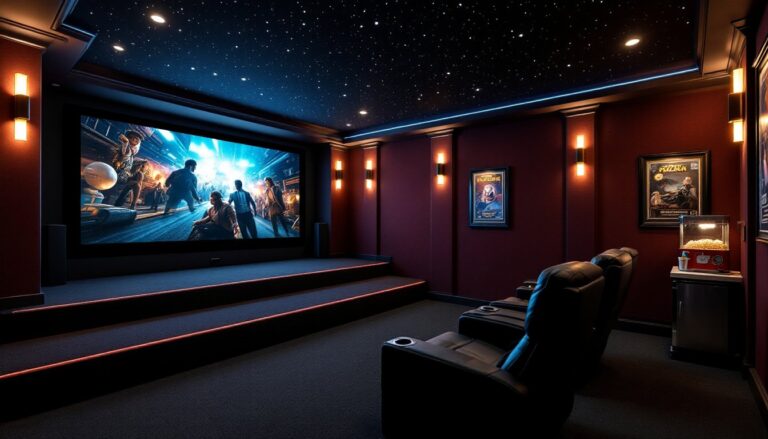
Theming adds personality but shouldn’t compromise function. A commercial cinema aesthetic, dark walls, red accents, movie posters in backlit frames, remains popular because it works. Dark colors (charcoal, navy, deep burgundy) absorb light and prevent screen reflections. Flat or matte paint finishes beat glossy.
Fabric wall panels serve double duty: acoustic treatment wrapped in decorative fabric. Choose colors that complement seating while absorbing sound. Guilford of Maine and ATS Acoustics offer hundreds of acoustically transparent fabrics in designer colors.
Movie poster displays need proper framing to avoid looking like a college dorm. Use matching frames with UV-protective glass or acrylic, and backlight them with LED strips for gallery-style presentation. Vintage posters from actual film releases (even reproductions) carry more authenticity than generic prints.
Carpet beats hard flooring in theaters, it absorbs sound, feels comfortable underfoot, and hides inevitable spills better than hardwood. Commercial-grade carpet tiles make sense because damaged sections can be replaced individually. Dark patterns hide stains: avoid light colors unless someone commits to serious maintenance.
Integrating personalized room elements can extend a cohesive design language from the theater into adjacent living spaces.
Concession areas don’t need much space, a small counter with a popcorn machine, mini fridge, and candy display fits in 20–30 sq ft. Popcorn machines pull 1,350–1,500 watts: verify the circuit can handle it alongside other equipment.
Avoid clutter and reflective surfaces. Glass-front cabinets, mirrors, and glossy trim all bounce light toward the screen. If display shelves are needed for collectibles, recess them into walls with doors or use open shelving with matte-finish backs.
Themed lighting like marquee signs or neon adds character but should dim or turn off during viewing. Mount these behind seating or in entryways where they don’t interfere with screen visibility.
Conclusion
A successful home theater balances technical performance with personal style. Room selection, equipment placement, proper acoustic treatment, and thoughtful design choices all contribute to spaces that deliver immersive entertainment for years. The work isn’t trivial, expect to invest time in planning, permit research where structural changes occur, and possibly hiring pros for electrical or soundproofing. But the result transforms how families experience movies, sports, and gaming at home.