Table of Contents
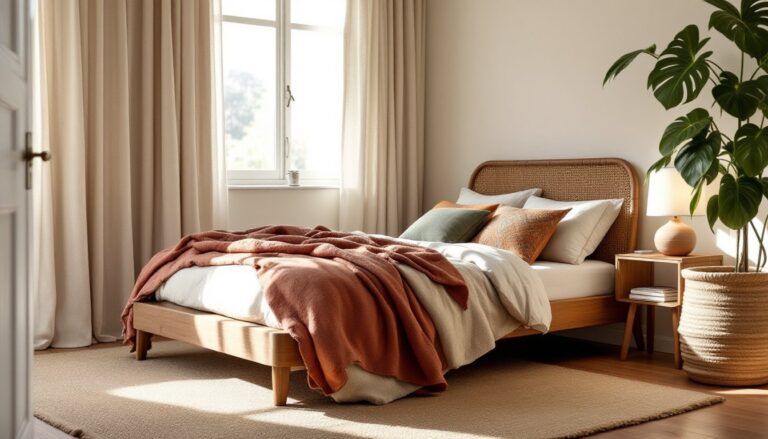
ToggleAdding a drink rail to a deck isn’t just about convenience, it’s about making outdoor spaces more functional and guest-friendly. Whether hosting a backyard cookout or enjoying a quiet morning coffee, a well-placed drink rail keeps beverages secure and hands free. These simple additions can be integrated into new railing systems or retrofitted to existing decks with minimal fuss. From permanent built-ins to removable options, there’s a drink rail solution for every deck style, budget, and skill level.
Key Takeaways
- A deck drink rail positioned at standard railing height (36–42 inches) provides a safe, stable surface for beverages while eliminating trip hazards and spills.
- Built-in drink rail solutions range from wide top caps (2×8 or 2×10) to stepped profiles and wraparound corner designs, all seamlessly integrated into new railing systems.
- Removable clamp-on drink rails offer flexible alternatives for renters or existing decks, with weight capacities ranging from 15 to 50 pounds depending on attachment method.
- Cedar, composite, PVC, and metal materials each offer distinct durability and maintenance profiles—choose pressure-treated pine for budget decks, cedar for natural rot resistance, or composite for zero-maintenance performance.
- DIY deck drink rail projects span beginner (friction-fit shelf brackets at $20–$40) to advanced (routed cup holders requiring precision tools), ensuring accessibility for any skill level.
- Creative enhancements like integrated LED lighting, bottle opener mounts, planter cutouts, and built-in coolers transform a functional drink rail into a multi-purpose entertaining feature.
What Is a Deck Drink Rail and Why You Need One
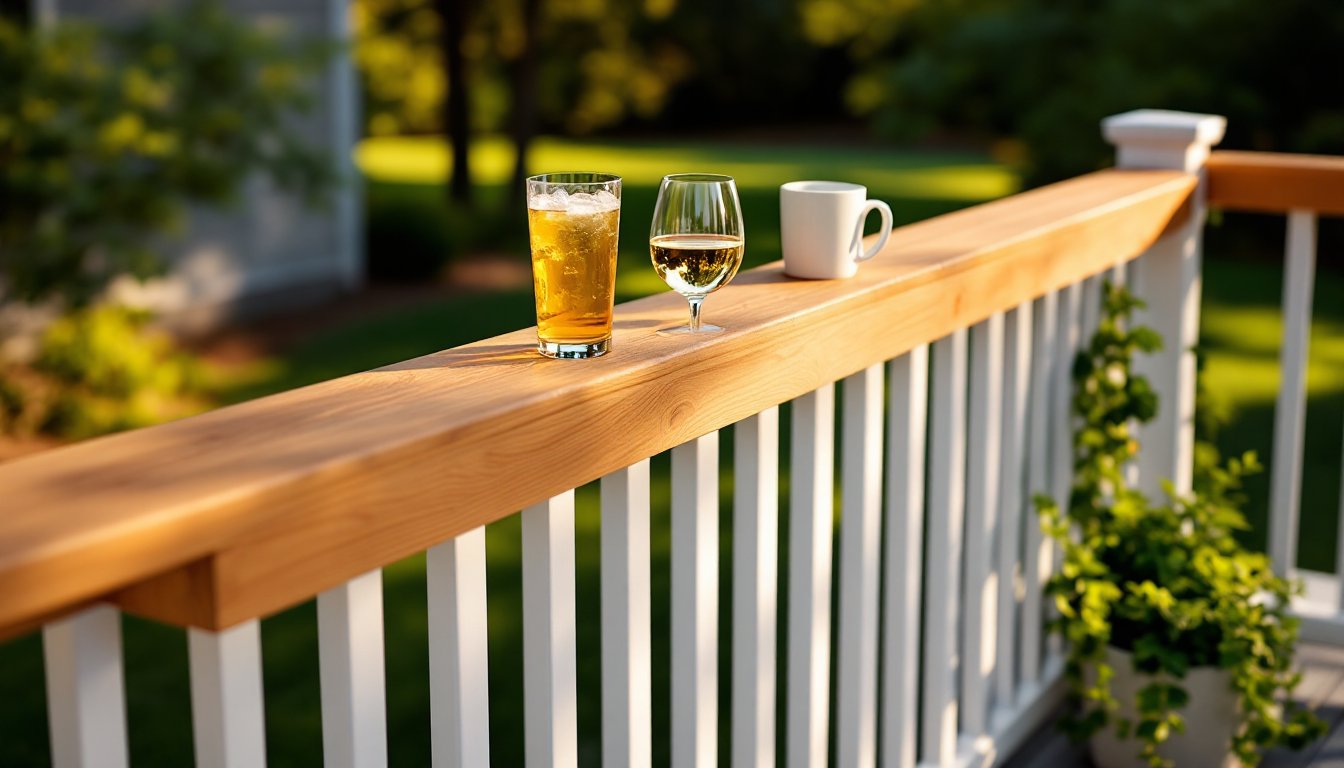
A deck drink rail is a flat, horizontal surface integrated into or attached to a deck railing system, designed to hold drinks, plates, or small items. Most measure 2 to 6 inches wide and run along the top cap of the railing or attach to vertical balusters.
The primary benefit is safety. Drinks placed on the ground create trip hazards, and balancing glasses on narrow railing caps leads to spills and broken glassware. A dedicated drink rail provides a stable surface at a comfortable height, typically 36 to 42 inches off the deck floor, matching standard railing height per IRC code.
Drink rails also improve traffic flow during gatherings. Guests don’t need to constantly search for flat surfaces, and the host doesn’t end up with rings on painted caps or water damage on wood railings. For decks with limited square footage, a drink rail adds usable surface area without taking up floor space.
They’re especially useful on second-story decks or pool surrounds where guests need both hands free to navigate stairs or ladders safely.
Built-In Deck Railing Drink Ledge Designs
Integrated Top Cap Systems
The most seamless approach is a wide top cap designed from the start to function as a drink ledge. Instead of the standard 2×4 or 2×6 cap (which measures 1.5″ × 3.5″ or 1.5″ × 5.5″ actual), opt for a 2×8 or 2×10 cap that provides a full 7.25″ or 9.25″ of flat surface.
This design works best with post-and-baluster railings where the cap overhangs the outer posts by 1 to 2 inches on each side. Secure the cap with galvanized or stainless steel screws driven into each post, two screws per post minimum to prevent warping. For composite decking systems, many manufacturers offer matching drink rail caps that snap into proprietary channel systems.
Stepped Drink Rail Profiles
A stepped profile adds a recessed groove or lip along the outer edge to prevent drinks from sliding off. This typically involves ripping a ¼-inch dado groove about ½ inch from the outer edge using a router or table saw. The groove should run continuously along the rail, stopping short at each post.
Some builders create a two-tier system: a narrow inner cap (2×4) for structural attachment and a wider outer shelf (1×6 or 1×8) that cantilevers beyond the balusters. The gap between tiers creates a natural drainage channel and keeps the drinking surface separated from the railing’s structural components.
Wraparound Corner Details
Corners require careful planning. Miter joints at 45 degrees look clean but can open up with seasonal wood movement. A better approach for outdoor conditions is a butt joint with a corner block, cut one cap square and let the adjacent cap butt into it, then add a triangular corner shelf that bridges both rails. This creates extra drink space at gathering points and hides any seasonal gaps.
Many outdoor entertaining ideas emphasize corner zones as natural congregation spots, making these corner drink rails particularly valuable during parties.
Removable and Clamp-On Drink Rail Options
Baluster-Mount Clamp Systems
For renters or those who want flexibility, clamp-on drink rails attach to existing balusters without drilling. Most use C-clamps or adjustable brackets that grip round or square balusters up to 2 inches in diameter. Look for models with rubber-coated contact points to prevent scratching powder-coated metal or painted wood.
These units typically provide 8 to 12 inches of depth and 24 to 36 inches of length. Weight capacity varies, most handle 15 to 25 pounds when properly secured to two balusters. Always check that balusters are structural (not just decorative) before loading them with weight.
Deck Post Table Attachments
Another removable option attaches directly to 4×4 or 6×6 posts. These L-bracket systems bolt through the post or use heavy-duty post clamps. The advantage is higher weight capacity, up to 50 pounds for through-bolted versions, and a cantilevered surface that doesn’t interfere with balusters or lower rails.
Installation requires marking level, drilling pilot holes (if through-bolting), and ensuring fasteners don’t hit existing post hardware. Use lag screws with washers, not deck screws, for anything supporting weight. For true no-damage removal, post-clamp versions work like giant hose clamps tightened with hex bolts.
Seasonal and Storage Considerations
Removable rails should come inside during winter in freeze-thaw climates. Even weather-resistant materials degrade faster when ice forms in joints and crevices. Store them flat in a dry location, leaning them against a wall can cause warping.
Before reinstalling each spring, check all mounting hardware for rust or stripped threads. Replace any questionable fasteners: a failed bracket during a party creates both a safety hazard and a liability issue.
DIY Deck Drink Rail Projects for Every Skill Level
Beginner: Friction-Fit Shelf Brackets
The simplest DIY approach uses galvanized shelf brackets (the type used for garage shelving) installed upside-down on the outer face of the top rail cap. Cut a 1×6 or 1×8 board to length, apply exterior wood stain or sealer, and rest it on the brackets. No advanced joinery required, just measure, cut, and fasten brackets to the cap with deck screws.
This method works on any existing railing and costs $20 to $40 for a 6-foot section. The shelf lifts off for cleaning or storage. Use at least one bracket every 24 inches to prevent sagging under weight.
Intermediate: Cedar Cap Overlay
For those comfortable with a miter saw, add a cedar 1×8 overlay directly atop an existing 2×4 cap. Cut 45-degree miters at corners for a finished look. Pre-drill and countersink holes, then attach with stainless steel trim screws every 16 inches. Fill screw holes with exterior wood filler or leave exposed for a craftsman aesthetic.
Cedar naturally resists rot and insects, and it doesn’t require finish if the silvered weathered look is acceptable. For maintained color, apply a clear exterior UV sealer annually. Total material cost runs $3 to $5 per linear foot depending on cedar grade (choose heartwood for best durability).
Advanced: Routed Drink Holder Caps
For woodworkers with a router and templates, custom caps with routed cup holders provide a high-end look. Use 2×10 or 2×12 lumber and rout circular recesses 3 to 4 inches in diameter and ¾ inch deep, spaced 18 to 24 inches apart. A Forstner bit in a drill press also works but requires careful depth control.
Add drainage by drilling a ¼-inch hole at the lowest point of each cup holder so rainwater doesn’t pool. Finish with marine-grade spar varnish for maximum moisture protection. Many woodworking project plans include templates for evenly spacing cup holders and creating consistent depths.
This project requires precision, uneven cup depths look amateurish, and routing too deep compromises the cap’s structural integrity. Budget $80 to $120 in materials for a 12-foot rail plus several hours of careful work.
Materials and Finishes That Last Outdoors
Wood Species and Grades
Pressure-treated pine is economical ($2 to $3 per linear foot) and lasts 15+ years with proper finish, but it requires annual sealing. Choose #1 grade or better to avoid excessive knots that trap water. Let it dry for 4 to 6 weeks after installation before applying stain, wet treated lumber won’t accept finish properly.
Cedar and redwood cost more ($4 to $8 per linear foot) but contain natural oils that resist decay. They can go unfinished but will turn gray. For color retention, use a penetrating oil finish rather than film-forming products that peel.
Tropical hardwoods (ipe, cumaru, tigerwood) offer 25+ year lifespans and incredible density but require carbide-tipped blades and pre-drilling every fastener hole. Expect $8 to $15 per linear foot and significantly more labor.
Composite and PVC Options
Capped composite materials (Trex, TimberTech, Azek) eliminate finish maintenance and resist fading better than early-generation composites. They don’t splinter, but they do expand and contract with temperature, leave ⅛-inch gaps at all joints and use manufacturer-specific fasteners that allow movement.
PVC (all-plastic) options handle moisture exposure better than wood-fiber composites and won’t rot even with standing water, making them ideal for drink rails where spills happen. But, they can feel hot to the touch in direct sun and may require higher-quality brackets since they’re softer than wood.
Metal Drink Rails
Powder-coated aluminum offers a modern look, zero maintenance, and no risk of rot. Custom-fabricated aluminum rails run $15 to $30 per linear foot installed, but off-the-shelf products are available for less. Ensure proper drainage, aluminum doesn’t absorb water, so spills need somewhere to go.
Stainless steel suits contemporary or marine settings but costs significantly more. It stays cool in sun better than dark-colored composites but shows water spots unless regularly wiped down.
Finish and Sealer Selection
For wood drink rails, use exterior-grade polyurethane or spar varnish that contains UV blockers. These film-forming finishes create a wipeable surface that sheds spills. Expect to sand and recoat every 2 to 3 years, horizontal surfaces weather faster than vertical ones.
Penetrating oil sealers (teak oil, Penofin, Ready Seal) soak into wood and won’t peel but require annual reapplication. They leave a natural feel and are easier to maintain, just clean and reapply without sanding.
Creative Features to Add to Your Drink Rail
Integrated Lighting
Low-voltage LED strip lighting installed along the underside of a drink rail cap provides ambient illumination for evening gatherings and helps guests locate their drinks in dim light. Use 12V DC outdoor-rated strips with a weather-resistant transformer. Route wiring through a ⅜-inch groove cut into the back of the cap to keep it hidden.
Solar-powered puck lights mounted on the deck posts work for those avoiding electrical work. Most provide 4 to 6 hours of light after a full sunny day.
Bottle Opener Mounts
A stainless steel wall-mount bottle opener screwed to a deck post or rail cap becomes the party’s most-used feature. Mount it with the catch positioned over a small bucket or install a drop-through cap catcher that collects caps in a hidden container below. This small detail prevents caps from ending up on the deck floor or in the yard.
Planter Cutouts
For wider drink rails (8+ inches), cut circular or rectangular openings sized for drop-in plastic planters. Fill them with herbs (basil, mint, rosemary) for fresh cocktail garnishes or trailing flowers for color. Line the cutout with a waterproof barrier and ensure drainage holes route water away from the rail structure. This approach mimics design concepts popular in southern home design, where functional decor serves multiple purposes.
Condiment Stations
On one section of rail, install recessed trays or narrow gutters that hold condiment bottles during cookouts. A simple approach: rout a shallow tray (½ inch deep, 4 inches wide) along a 3-foot section of the rail and line it with stainless steel sheet metal bent to fit. This keeps bottles from tipping and creates a designated spot that doesn’t take up grill space.
Built-In Coolers
For high-commitment projects, frame a section of drink rail to accept a drop-in cooler trough. Use galvanized or stainless steel livestock watering troughs (available at farm supply stores) or purpose-built deck coolers. Ensure the structural framing below can support the added weight, a filled cooler can easily exceed 100 pounds. This feature works best at deck corners or near stairs where it won’t block traffic.
Conclusion
A well-designed drink rail makes a deck more usable without major construction. Whether choosing a built-in cap, a clamp-on shelf, or a custom routed design, the key is matching the solution to the deck’s style, the builder’s skill level, and how the space gets used. With proper materials and realistic planning, a drink rail becomes one of those upgrades that guests notice and use every single time.