Table of Contents
ToggleTight bathroom layouts don’t have to mean compromising on storage or style. Corner vanities turn dead space into functional real estate, opening up the room while delivering counter and cabinet space where you need it. Whether you’re retrofitting a powder room, designing a master bath around unusual plumbing, or just trying to squeeze a sink into a half-bath under the stairs, a corner unit can solve problems that standard vanities can’t. The key is matching the right style and installation approach to your layout, existing fixtures, and skill level.
Key Takeaways
- Corner vanities maximize storage and functionality in small bathrooms by utilizing unused corner space, saving $300–$600 in potential replumbing costs compared to repositioning standard wall-mounted units.
- Floating corner vanities create a spacious visual effect in tight layouts, while traditional floor-mounted cabinets with lazy Susan shelves or pull-out drawers provide greater storage volume and easier installation.
- Prioritize plywood or sealed solid wood cabinets over particleboard to prevent moisture damage in humid bathroom environments, and ensure removable panels for P-trap access and future maintenance.
- Plan corner vanity height at 32–36 inches from floor to countertop with 4 inches clearance below for mop access, and maintain 24 inches minimum clearance from the vanity to nearby obstacles per IRC codes.
- Select moisture-resistant countertop materials like solid surface Corian or epoxy-grouted tile for corner installations, and use GFCI-protected outlets within 3 feet of the water source for electrical safety.
- Adjust lighting and mirror placement for corner vanities by installing two angled mirrors, a large frameless mirror spanning both walls, or vertical sconces on adjacent walls to avoid shadows and wiring complications.
Why Choose a Corner Vanity for Your Bathroom
Corner vanities excel in three scenarios: small footprint bathrooms (under 40 square feet), awkward plumbing locations that don’t align with standard wall-mounted vanities, and multifunctional spaces like laundry-bath combos where every inch counts.
A standard 24-inch vanity projects straight out from the wall, eating up floor space in the center of the room. A corner unit of similar countertop area tucks into the 90-degree angle, leaving the center open for movement. This matters most in narrow bathrooms (less than 5 feet wide) where a protruding vanity forces you to sidestep past it.
Corner installations also work around existing supply and drain lines without requiring major replumbing. If your hot and cold supplies emerge in a corner, common in older homes with stacked plumbing, a corner vanity aligns perfectly without custom rough-in work. That can save $300–$600 in plumber’s fees compared to relocating lines for a wall-mount unit.
The trade-off: limited countertop depth. Most corner vanities offer 18–22 inches of usable counter along each wall, narrowing to 12–14 inches at the diagonal front edge. That’s enough for a faucet, soap dispenser, and a small tray, but not for sprawling grooming product collections. Plan vertical storage (medicine cabinets, wall shelves) to compensate.
Best Corner Vanity Styles for Small Bathrooms
Floating Corner Vanities for Modern Aesthetics
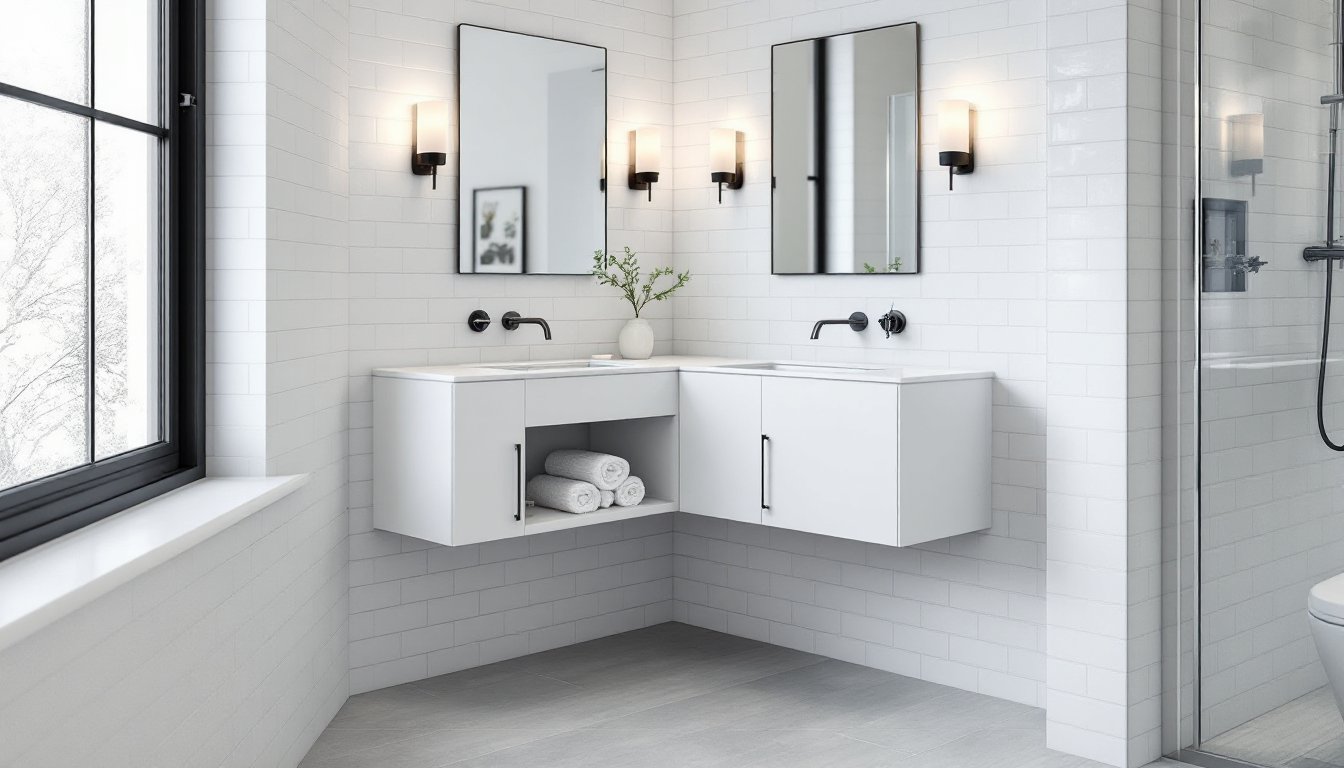
Wall-mounted corner vanities attach directly to wall studs with no floor contact, creating a floating effect that makes small bathrooms feel larger. The visible floor underneath tricks the eye into perceiving more square footage.
Installation requires locating studs in both walls at the corner (use a stud finder and mark with painter’s tape). You’ll mount a ledger board, typically a 2×4 or heavy-duty steel bracket, across the studs at the height of the vanity bottom, minus the thickness of any mounting plate. Most floating units ship with a steel frame that hangs on the ledger: the vanity cabinet slides onto the frame.
Key structural note: Each wall must have at least one stud within the vanity’s footprint for secure mounting. If studs don’t align, you’ll need to open the drywall, add blocking (horizontal 2×4s between studs), and patch. This is common in corners where stud spacing doesn’t cooperate. Budget 2–3 hours for blocking work if needed.
Floating units typically max out at 200 pounds load capacity (cabinet + countertop + contents). Stone countertops (granite, quartz) can exceed this if the vanity span is wide. Verify the manufacturer’s weight rating before ordering a stone top.
Clearance tip: Leave at least 4 inches between the vanity bottom and the floor for mop access and to avoid a cramped look. Standard height for wall-hung vanities is 32–36 inches from floor to countertop, matching conventional vanity heights.
Traditional Corner Cabinets with Storage
Floor-mounted corner cabinets rest on adjustable legs or a toe-kick base, offering more storage volume and simpler installation. No stud-hunting required, just level the unit and secure it to the wall with a few screws to prevent tipping.
Look for units with lazy Susan shelves or pull-out drawers inside the corner cabinet. Deep corner spaces are black holes without rotating or sliding organizers. A fixed shelf in a 90-degree cabinet means everything behind the first 6 inches is unreachable without crawling halfway inside.
Material choices affect durability in bathrooms, where humidity and splashing are constant:
- Solid wood cabinets (maple, oak, birch) hold up well if sealed properly, but avoid particleboard cores, they swell and delaminate when wet. Check the cabinet back and interior for exposed particleboard edges: quality units encase all edges in veneer or edge banding.
- Plywood construction is the gold standard for bathroom cabinets. It resists moisture better than MDF or particleboard and holds hinge screws without stripping over time.
- Thermofoil or PVC-wrapped cabinets are waterproof and affordable but can peel at the edges if the adhesive fails. They’re a solid budget option for powder rooms (low moisture) but questionable for full baths with showers.
Depth matters: Traditional corner cabinets range from 24 to 34 inches per wall leg. Measure your bathroom door swing and toilet clearance before committing. The International Residential Code (IRC) requires 21 inches minimum clearance in front of a toilet and 30 inches from the center of the toilet to any obstruction. A deep corner vanity can encroach on these minimums in tiny bathrooms.
Design Tips for Installing Corner Bathroom Vanities
Start with plumbing layout. Before shopping, trace your existing supply and drain lines. Take a photo and measure their distance from the finished corner (where the two walls meet). Most corner vanities position the sink off-center, with the drain 8–12 inches from the corner apex along the diagonal front edge. If your drain is centered in the corner, you’ll need an offset drain kit or a plumber to relocate it.
P-trap clearance is tight in corner installs. The trap typically sits inside the cabinet, but in shallow units (less than 18 inches deep) it can interfere with door swing or drawer slides. When design solutions for bathroom corners include furniture pieces, plumbing access becomes critical, ensure cabinet doors or panels are removable for future trap service.
Countertop options for corner vanities include:
- Solid surface (Corian, cultured marble): Can be fabricated with integrated sinks and seamless backsplashes. Ideal for corner installs because custom shapes avoid seams in the 90-degree turn. Expect $300–$600 for a corner-specific countertop with integrated bowl.
- Tile: Affordable and DIY-friendly, but grout lines in corners collect grime. Use epoxy grout (not sanded or unsanded cement grout) for moisture resistance and easier cleaning. Slope the tile slightly toward the sink to prevent standing water behind the faucet.
- Stone slab: Granite and quartz require professional fabrication and seaming at the corner. The seam will be visible and is a weak point for water intrusion. Seal it with clear silicone during installation and re-seal annually.
- Prefab tops: Cheapest option ($80–$150), but corner-specific prefab tops are rare. You may need to order a custom size or cut down a standard top (voiding the warranty).
Faucet placement differs on corner vanities. The sink often sits at the diagonal front, 10–14 inches from the back corner walls. Measure faucet reach, the distance from the faucet base to where the water stream hits. It should land over the drain, not against the back of the bowl. Single-hole or widespread faucets both work: confirm the countertop has predrilled holes matching your faucet type.
Lighting and mirror positioning require adjustment. A standard mirror centered over a wall-mounted vanity won’t work over a corner unit. Consider:
- Two smaller mirrors angled in the corner, creating a wraparound effect.
- A large frameless mirror spanning both walls behind the vanity (allows reflection from multiple angles).
- Vertical sconces mounted on the adjacent walls flanking the corner, rather than above the mirror (avoids shadows and wiring complexity in the corner itself).
Safety reminder: Wet locations within 3 feet of a water source require GFCI-protected outlets per NEC Article 210.8. If you’re adding outlets near the vanity, use GFCI receptacles or ensure the circuit has GFCI protection at the breaker. Hire a licensed electrician for any new wiring, bathroom electrical work is not a beginner DIY task.
Corner Vanity Ideas for Different Bathroom Layouts
Powder rooms (under 25 square feet): A compact corner pedestal or floating vanity (18–22 inches per wall) frees up floor space for easier access. Skip the cabinet storage if the room is only used by guests, opt for a sleek vessel sink on a floating shelf for a modern look. If you do need storage, a single-door cabinet with an interior shelf handles hand towels and backup toiletries.
Jack-and-Jill bathrooms (shared between two bedrooms): Corner vanities can work as a secondary sink station opposite a main double vanity, giving each user their own zone. This layout suits families with teens or in homes where renovation inspiration and design trends prioritize individual space. Run dedicated hot and cold lines to the corner vanity to avoid pressure drops when both sinks run simultaneously.
Master baths with separate toilet rooms: If your toilet is enclosed in a separate water closet, the main bathroom may have an awkward open corner. A corner vanity fills that gap without blocking access to a shower or soaking tub. Consider a deeper unit (30+ inches per wall) for substantial countertop area, this becomes your primary prep zone.
Basement or garage half-baths: These retrofits often lack ideal plumbing locations. A corner vanity can tie into existing utility sink plumbing or a nearby washing machine drain. Use a saniflo pump or sewage ejector pump if the drain line is above floor level (common in basements). The pump requires a dedicated 120V GFCI outlet, coordinate with an electrician during planning.
Long, narrow bathrooms (galley-style): Corner placement at one end opens up the length of the room. This works best when the entry door is at the opposite end, you walk in and see an open stretch of floor rather than immediately facing a vanity. Pair with a curbless shower or tub at the far end to emphasize the elongated sightline, a technique often featured on home design and renovation programming.
Layout tip for all configurations: Maintain 24 inches minimum clearance from the vanity’s outermost point to the nearest obstruction (toilet, shower door, opposite wall). This is the IRC recommended minimum for comfortable use and meets ADA guidelines for accessible design. If you can’t achieve 24 inches, consider a smaller vanity or a wall-mount sink with no cabinet.
Ventilation matters: Corner locations, especially in windowless bathrooms, can trap humidity. Install an exhaust fan rated for the room’s cubic footage (length × width × height × 8 air changes per hour ÷ 60 minutes = CFM rating). Position the fan near the shower or tub, not directly over the vanity, to pull moist air away from the cabinet.
Conclusion
Corner vanities solve real spatial problems, they’re not just a design quirk. Match the style and installation method to your bathroom’s size, plumbing reality, and how much DIY work you’re willing to take on. Measure twice, account for door swings and code clearances, and don’t skimp on moisture-resistant materials. A well-planned corner vanity turns an awkward angle into the most efficient square footage in the room.