Table of Contents
ToggleBuilding a brick patio doesn’t mean draining the savings account. With the right approach, homeowners can create a durable, attractive outdoor space that costs a fraction of what contractors charge for stamped concrete or natural stone. Brick offers distinct advantages: it’s DIY-friendly, requires minimal specialized tools, and looks better with age rather than worse. This guide breaks down practical patterns, sourcing strategies, and installation techniques that keep costs low without sacrificing quality. Whether working with new pavers or salvaged materials, the same principles apply, smart planning and sweat equity deliver professional-looking results on a working-class budget.
Key Takeaways
- Brick patio ideas on a budget start with standard clay pavers costing just $0.50–$2 per brick, making them one of the most economical hardscaping materials available for DIY projects.
- The herringbone pattern creates superior visual interest and durability without additional material costs, using the same number of bricks with better interlock to resist shifting in freeze-thaw climates.
- DIY installation saves $2,400–$4,000 in labor on a typical 200-square-foot patio, making sweat equity the single biggest cost advantage for budget-conscious homeowners.
- Reclaimed and recycled brick sourced from demolition sites costs 40–60% less than new pavers while maintaining 25+ years of durability when properly inspected and installed.
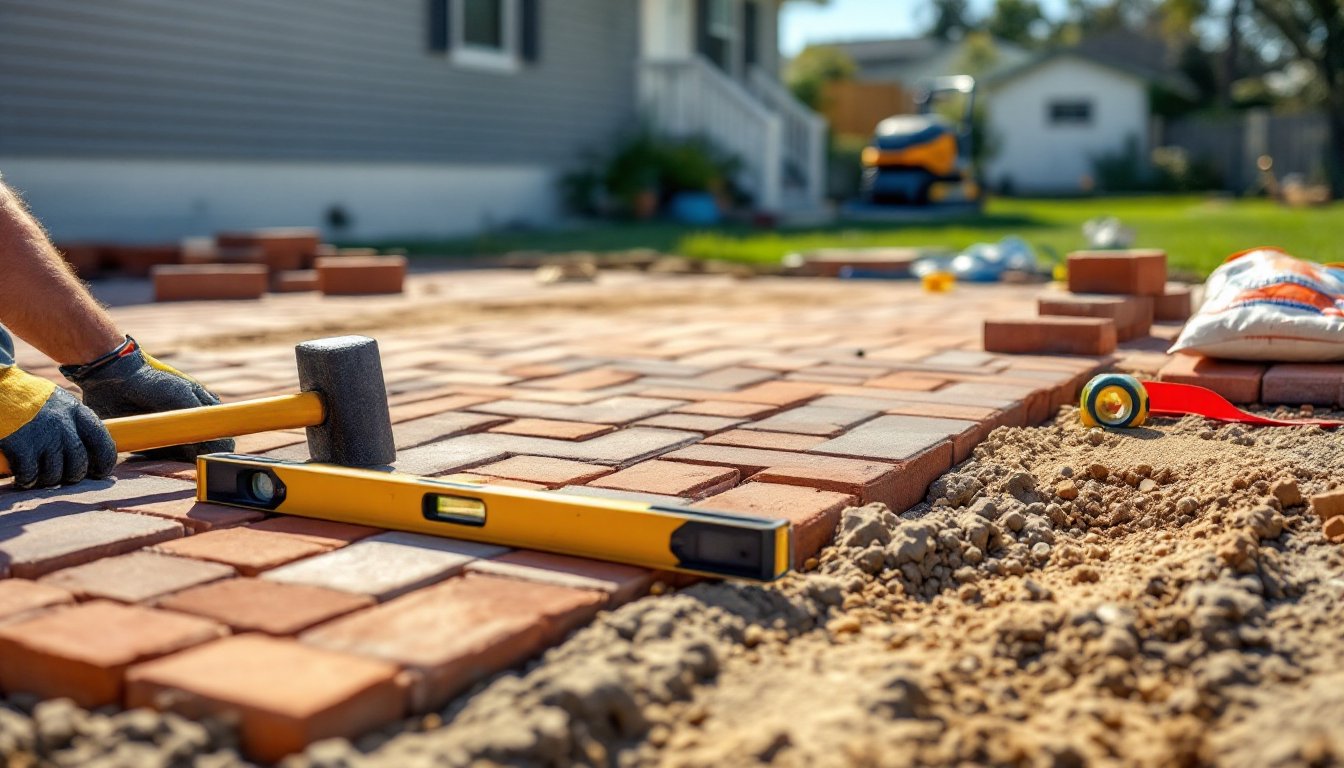
- Proper base preparation with 4 inches of compacted crushed stone and 2 inches of sand determines long-term patio success, preventing uneven settling and costly repairs.
- Mixed-material designs using brick borders, gravel sections, and contrasting edge treatments create high-end aesthetics while reducing total material costs by 15–25%.
Why Brick Is the Perfect Budget-Friendly Patio Material
Standard clay pavers run $0.50 to $2 per brick depending on region and quantity, making them one of the most economical hardscaping options available. Unlike poured concrete that requires forms, reinforcement, and precise timing, brick installation tolerates interruptions, perfect for weekend warriors tackling projects in stages.
The material itself forgives mistakes. Drop a paver wrong? Pick it up and reset it. Need to adjust the layout mid-project? Pull up a section and relay it. Compare that to concrete, where errors get expensive fast. Brick’s modular nature means no mixing, no curing time, and no worries about cold snaps ruining a pour.
Durability matters when budgeting long-term. Properly installed brick patios last 25+ years with minimal maintenance, just occasional sweeping and weed control between joints. They handle freeze-thaw cycles better than concrete (which cracks) and cost less to repair than flagstone (which shifts and settles unevenly). When individual pavers do crack or stain beyond cleaning, replacement takes minutes, not a full demolition.
Tool requirements stay minimal. A rubber mallet, level, tape measure, and hand tamper handle most installations. Rent a plate compactor for $40-60/day if the base exceeds 100 square feet, but smaller patios work fine with manual compaction. No concrete mixer, no screeds, no trowels, just straightforward physical work.
Classic Herringbone Pattern for Timeless Appeal
The herringbone pattern creates visual interest without adding material costs, same number of bricks, better-looking result. The 45-degree or 90-degree zigzag arrangement provides superior interlock, meaning the patio resists shifting and settling better than simpler layouts. This matters in areas with clay soil or freeze-thaw movement.
Layout requires more planning than running bond, but the cuts aren’t difficult. Border the patio with a soldier course (bricks laid perpendicular to the field) to create clean edges and reduce the number of angled cuts needed. The perimeter bricks take straight cuts, while the field pattern locks together without cutting in most cases. Budget an extra 5-10% of materials for edge cuts and breakage.
Installation time runs about 15-20% longer than running bond due to the alternating angles, but the payoff shows immediately. The pattern naturally guides the eye across the space, making small patios feel larger. It also hides minor inconsistencies in brick dimensions better than straight patterns, useful when mixing batches or using salvaged materials.
Tool needs stay the same as any brick project: wet-cut masonry saw or brick chisel for edge work. Many tool rental centers offer masonry saws for $50-70/day, though a $30 brick set and hand drilling hammer handle border cuts for smaller projects. Wear safety goggles and a dust mask when cutting, silica dust from brick creates serious respiratory hazards.
Running Bond Layout: Simple and Cost-Effective
Running bond, the classic offset brick pattern, remains the fastest, cheapest installation method available. Each row offsets by half a brick length, creating natural interlocking with minimal planning. First-time DIYers complete running bond layouts with fewer errors and less wasted material than any other pattern.
Material waste drops to nearly zero. Cut one brick in half to start every other row, and those halves bookend the opposite rows. No complex angles, no specialty cuts, no head-scratching over how pieces fit together. This simplicity translates to faster completion, a motivated homeowner can lay 100 square feet in a weekend, including base prep.
The pattern works especially well for narrow walkways or rectangular patios where the long axis runs parallel to the house. Lay bricks perpendicular to the walking direction for better stability under foot traffic. For patios wider than 8 feet, consider running the pattern at a 45-degree angle to the borders, it costs nothing extra but adds visual dimension.
Running bond pairs perfectly with mixed brick lots. Slight color or size variations disappear in the repeating horizontal lines, whereas they’d stand out in basket-weave or circular patterns. This makes it ideal for salvaged brick projects where consistency isn’t guaranteed. The forgiving nature means less time sorting and more time installing.
Reclaimed and Recycled Brick Options to Cut Costs
Reclaimed brick often costs 40-60% less than new pavers when sourced strategically. Check demolition sites, salvage yards, and online marketplaces where contractors offload materials from teardowns. Common finds include Chicago commons, street pavers, and old building brick, all dense enough for ground-level patio use.
Inspect carefully before buying. Look for solid cores (not hollow), minimal chipping on edges, and absence of mortar penetration that weakens the brick. A few dings add character: structural cracks or spalling (surface flaking) mean the brick won’t survive freeze-thaw cycles. Pass on any lot where more than 10% shows significant damage.
Cleaning old brick takes time but not money. Soak pieces in water, then scrub with a wire brush to remove most mortar and dirt. Stubborn spots respond to a diluted muriatic acid solution (1 part acid to 10 parts water), but wear chemical-resistant gloves and eye protection, acid splashes cause serious burns. Work outdoors with good ventilation.
Mixing reclaimed and new brick stretches budgets further. Use salvaged material for the field and new brick for borders where color consistency matters more. Or reverse it, new pavers in high-traffic areas for durability, reclaimed in decorative zones for character. The 20-30% savings on bulk material often funds upgraded base materials or edging that improves long-term performance.
DIY Installation Tips to Save on Labor Expenses
Professional installation typically costs $12-20 per square foot for labor alone, meaning a 200-square-foot patio runs $2,400-4,000 just for someone else to do the work. DIY installation requires muscle and patience, not specialized skills, making it the single biggest cost savings available.
Proper base preparation determines whether the patio lasts 5 years or 25. Excavate to a depth of 6-8 inches below final patio height. Add 4 inches of compacted 3/4-inch crushed stone (often called crusher run or road base), then 2 inches of coarse sand as a leveling bed. Many affordable patio patterns rely on this standard base system for stability.
Compaction matters more than most beginners realize. Rent a plate compactor and make multiple passes over the stone base, adding material in 2-inch lifts rather than dumping all 4 inches at once. Poorly compacted bases settle unevenly, creating low spots that puddle and freeze, which leads to heaving and cracked pavers. The sand layer gets screeded level but not compacted, it’s the cushion that allows final brick adjustment.
Edging prevents long-term creep and border collapse. Install plastic paver edging or a buried soldier course (bricks set vertically) along all perimeter edges before laying the field. Secure edging with 10-inch landscape spikes every 18 inches. Skip this step and watch the patio slowly spread outward as sand escapes and bricks shift.
Joint sand locks everything together. After laying all bricks, spread polymeric sand across the surface and sweep it into joints, misting lightly to activate the polymer binders. Standard play sand costs less but washes out and allows weed growth, the $20 extra for polymeric sand per 100 square feet pays off in reduced maintenance. Wear a dust mask during application: the fine particles irritate lungs.
Creative Design Ideas That Maximize Impact on a Tight Budget
Mixed-size pavers create high-end looks without high-end pricing. Combine standard modular brick (3-5/8″ × 7-5/8″) with occasional half-bricks or utility-size pavers to break up monotony. Random-sized patterns mimic European cobblestone at a fraction of the cost, the materials run the same price as uniform brick, but the visual complexity suggests custom design.
Integrate gravel or crushed stone as intentional negative space. Designate 20-30% of the patio area as decomposed granite or pea gravel sections bordered by brick. This technique cuts brick requirements (and costs) while adding textural contrast. It also improves drainage in areas where solid paving might create runoff issues. Standard project estimates from HomeAdvisor show mixed-material patios averaging 15-25% lower material costs than solid brick.
Border treatments transform basic layouts into designed spaces. A double soldier course (two rows of perpendicular bricks) frames the patio and adds perceived value for minimal cost, usually 50-75 extra bricks for a 12′ × 16′ space. Contrasting brick colors in the border cost the same as field pavers but create definition that mimics custom masonry work.
Sunken vs. raised installation affects both cost and aesthetics. A flush-grade patio (brick level with surrounding lawn) requires more excavation but no additional edging materials. A raised patio needs retaining blocks or timbers around the perimeter, adding $200-400 in materials but reducing dig-out labor. Choose based on site drainage and existing grade, raised works better in low spots prone to standing water.
Lighting integration doesn’t require an electrician. Solar pavers (brick-sized units with integrated LEDs) drop into the pattern wherever accent lighting makes sense, along steps, borders, or seating areas. They cost $8-15 each vs. $2 for standard brick, so limit to 8-10 units for budget-friendly impact. Low-voltage LED strip lighting tucked under coping or seating walls adds ambiance for under $100 in materials, and installation requires only basic wire connections.
Conclusion
Budget constraints don’t mean settling for a mediocre patio. Brick offers the rare combination of affordability, durability, and DIY-friendliness that makes professional-quality results accessible to motivated homeowners. The difference between a $1,200 project and a $6,000 contractor quote comes down to sweat equity and smart material sourcing, not quality. Choose patterns that match skill level, prep the base correctly the first time, and don’t skip edge restraints. The patio that results will outlast most marriages and cost less than a week’s vacation.