Table of Contents
ToggleDesigning a bedroom for a girl means striking a balance between charm and function. Whether she’s five or fifteen, the room should reflect her personality while offering practical solutions for storage, assignments, and downtime. The best designs grow with her, avoiding overly themed approaches that date quickly. Instead, focus on versatile color choices, quality furnishings, and layers of decor that can be swapped as tastes evolve. This guide walks through six core strategies, from palette selection to lighting, that turn any bedroom into a space she’ll actually want to spend time in.
Key Takeaways
- Cute bedroom ideas for girls thrive when you choose versatile color palettes like blush, sage green, and lavender that grow with her instead of relying on trendy all-pink designs.
- Create a cozy reading nook with floating shelves, warm LED lighting (2700K–3000K), and a comfortable seating option to encourage downtime and relaxation.
- Maximize storage with dual-purpose furniture like storage beds, cube organizers with fabric bins, and second hanging rods in closets to keep the space organized without sacrificing floor room.
- Layer textures with machine-washable bedding, area rugs with non-slip pads, and blackout curtains to add warmth and functionality while maintaining easy maintenance.
- Incorporate flexible lighting—dimmer switches, task lighting, and accent string lights—to shift the room’s mood from daytime productivity to evening wind-down.
- Use removable decor like peel-and-stick wallpaper, adhesive hooks, and vinyl decals to personalize the space without permanent commitment, allowing the design to evolve as she grows.
Pick a Playful Color Palette That Sparks Joy
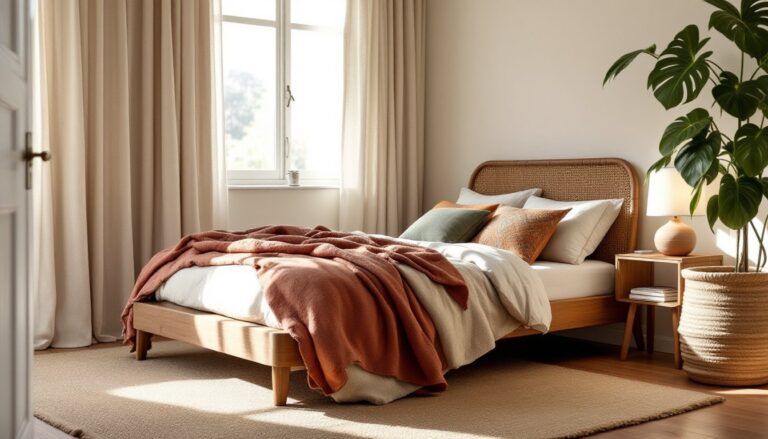
Start with paint, it’s the most cost-effective way to change a room’s mood. Skip the all-pink-everything trap: it limits flexibility and can feel childish fast. Consider softer blush tones paired with cream or gray as a base, then add accent colors through accessories. Sage green, lavender, and dusty blue hold up well through grade school and beyond.
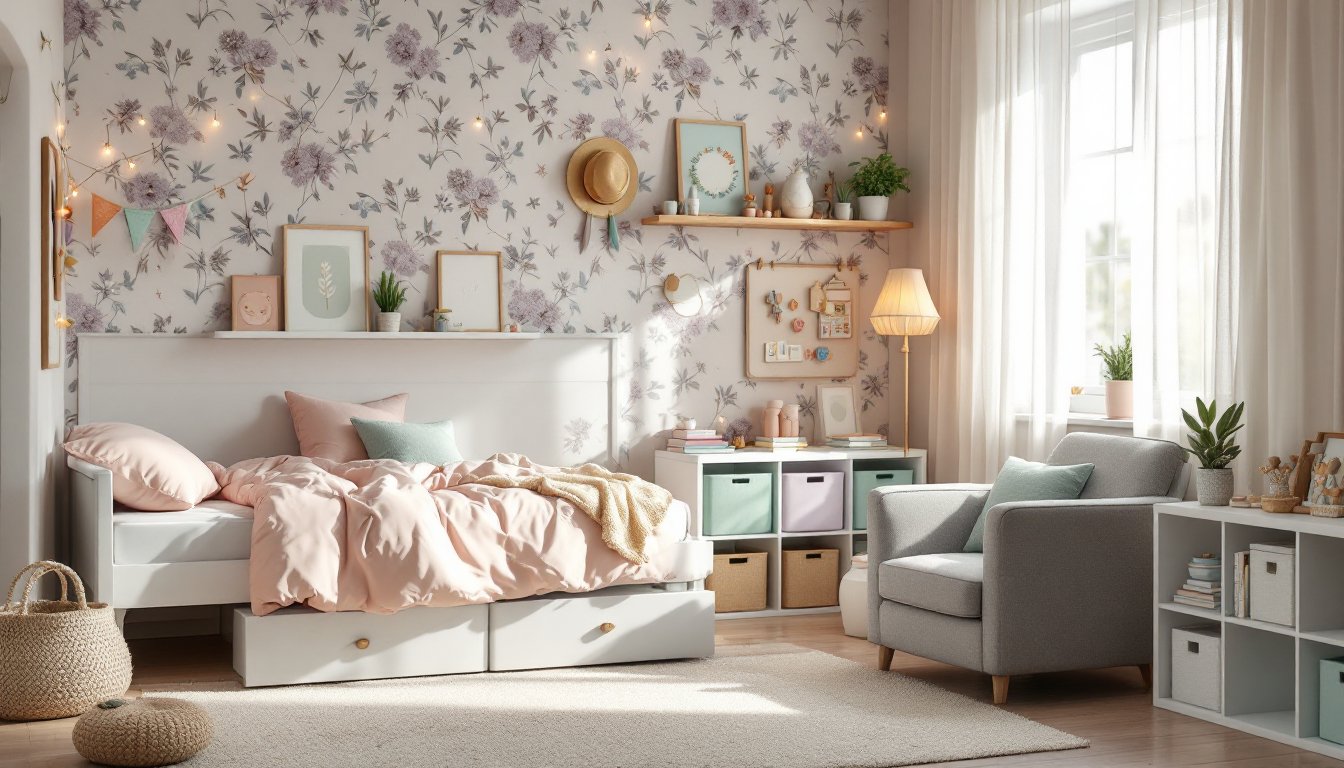
For an accent wall, use peel-and-stick wallpaper in geometric, floral, or cloud patterns. It’s removable, renter-friendly, and doesn’t require paste or professional installation. Apply it behind the bed or on one side wall to create a focal point without overwhelming the space.
Paint coverage typically runs 350–400 square feet per gallon for standard latex finishes. Use eggshell or satin sheens in bedrooms: they’re easier to clean than flat paint and don’t show imperfections as much as semi-gloss. Always prime walls first if covering dark colors or fresh drywall to avoid streaking and multiple coats.
If she’s old enough to participate, let her pick two or three colors from a pre-approved palette. This builds buy-in without turning the room into a design free-for-all. Use painter’s tape and sample pots to test colors in different lighting before committing.
Create a Cozy Reading Nook She’ll Never Want to Leave
Carve out a corner with a bean bag chair, floor cushion, or small upholstered chair. If the room has a window seat, add a custom cushion cut to fit the sill using 2-inch-thick foam wrapped in washable fabric. Staple the fabric to a plywood base for a tailored look that doesn’t shift.
Install floating shelves at kid-height for easy book access. Use ¾-inch plywood or MDF boards cut to 8–12 inches deep, mounted on heavy-duty brackets rated for at least 50 pounds. Locate wall studs with a stud finder and fasten brackets with 3-inch wood screws. If studs don’t align, use toggle bolts rated for drywall anchoring.
Add a small side table or wall-mounted swing-arm lamp to avoid tangled cords on the floor. LED bulbs in the 2700K–3000K range provide warm, non-glare light suitable for reading. Avoid overhead-only lighting in nooks: it casts shadows on pages.
Layering a small 4×6-foot area rug under the seating defines the zone and adds warmth on hardwood or laminate floors. Opt for low-pile rugs in high-traffic areas, they’re easier to vacuum and less likely to trip smaller kids.
Add Whimsical Wall Decor and Personalized Touches
Wall decor is where personality shines without permanent commitment. Use removable adhesive hooks (rated for the weight you’re hanging) to avoid patching nail holes later. Create a gallery wall with a mix of framed art, photos, and fabric pennant banners.
For a DIY project, build a simple pegboard display using ¼-inch pegboard panels from the home center. Cut to size with a circular saw, sand edges, and paint in an accent color. Mount it to the wall using 1-inch wood spacers behind the board so hooks can fit through the holes. This setup works for hanging hats, bags, jewelry, or small potted plants.
Consider a magnetic or cork board for rotating art, notes, and school reminders. A 2×3-foot framed cork panel is large enough to be functional but doesn’t dominate a wall. Some DIY decor projects focus on repurposing old frames or fabric-covered boards for budget-friendly personalization.
Lettering decals and name signs are popular but avoid anything that requires drilling into studs unless you’re confident it’ll stay long-term. Peel-and-stick vinyl letters can be repositioned and removed cleanly if applied to painted drywall (not textured or fresh paint).
Maximize Storage with Cute and Functional Furniture
Kids accumulate stuff fast. Prioritize furniture that hides clutter without sacrificing floor space. A storage bed with built-in drawers replaces a traditional bed frame and dresser, freeing up room for play or study areas. Look for units with dovetail drawer joints and ball-bearing glides, they hold up better than stapled particleboard.
Use cube organizers with fabric bins for toys, books, and accessories. A 4×4 cube unit (roughly 15 inches per cube) can be positioned horizontally as a bench or vertically as a bookshelf. Anchor tall units to the wall with furniture straps or L-brackets to prevent tip-over hazards, especially in homes with toddlers or earthquakes.
For closets, add a second hanging rod at a lower height so she can reach her own clothes. Install it at 40–48 inches from the floor depending on her age. Use the upper rod for out-of-season items. Closet rod brackets should be screwed into studs or blocking: drywall anchors aren’t sufficient for the weight of hanging clothes.
Many furniture makeover tutorials show how to refresh hand-me-down dressers with new paint, knobs, and drawer liners, an affordable way to customize storage on a budget.
Layer Textures with Bedding, Rugs, and Curtains
Layering soft goods adds warmth and depth without structural changes. Start with a duvet cover or quilt in a pattern that ties the color palette together. Choose machine-washable fabrics, cotton or cotton-blend percale is durable and breathes well.
Add throw pillows and a lightweight blanket at the foot of the bed. Mix solids with patterns in complementary colors. Avoid overloading a twin bed: two or three pillows plus a throw is plenty.
For rugs, an 8×10-foot area rug grounds a full bedroom, but a 5×7 works in smaller rooms or under the bed only. Natural fiber rugs (jute, sisal) are budget-friendly but can be scratchy underfoot: synthetic blends offer softness and stain resistance. Use a rug pad underneath to prevent slipping and extend rug life.
Blackout curtains help with sleep schedules, especially for younger kids. Hang the rod 4–6 inches above the window frame and extend it 3–4 inches on each side so curtains can be fully drawn without blocking light. Use drywall anchors or toggle bolts if you can’t hit a stud: curtain rods with heavy fabric can pull out of poorly secured mounts.
Some room transformation projects highlight budget fabric swaps and DIY curtain hems that customize off-the-rack panels without sewing skills.
Incorporate Fun Lighting to Set the Perfect Mood
Lighting shifts a bedroom’s vibe from daytime productivity to evening wind-down. Layer three types: ambient (overhead), task (desk or reading), and accent (string lights or nightlight).
Swap a builder-grade flush-mount ceiling fixture for a semi-flush pendant or small chandelier with a playful silhouette, think cloud shapes, wire cages, or fabric drum shades. Make sure the fixture is rated for the bulb wattage you’ll use: LED bulbs consume less energy and produce less heat than incandescent.
Install a dimmer switch to control overhead brightness. Single-pole dimmers are a straightforward DIY swap if you’re comfortable working with electrical boxes. Turn off the breaker, remove the old switch, and connect the dimmer per the manufacturer’s wiring diagram, typically matching black (hot) to black, white (neutral) to white, and green (ground) to bare copper. If you’re uncertain, hire a licensed electrician. Dimmer-compatible LED bulbs are labeled as such: not all LEDs dim smoothly.
For accent lighting, battery-operated or plug-in LED string lights add a whimsical touch without hardwiring. Drape them along a headboard, around a mirror, or inside a canopy frame. Use adhesive cable clips to keep cords tidy and off the floor, trip hazards are real.
A bedside table lamp with a fabric or paper shade softens light for reading. Choose one with a three-way switch so she can adjust brightness without getting up.
Conclusion
A well-designed girls’ bedroom balances style with adaptability. By focusing on flexible color schemes, smart storage, layered textiles, and thoughtful lighting, the space can evolve as she grows. Tackle projects in phases, paint and lighting first, furniture and decor as budget allows. Prioritize quality over trends, and don’t skip the prep work. With a little planning and elbow grease, her bedroom becomes a functional retreat she’s proud to call her own.